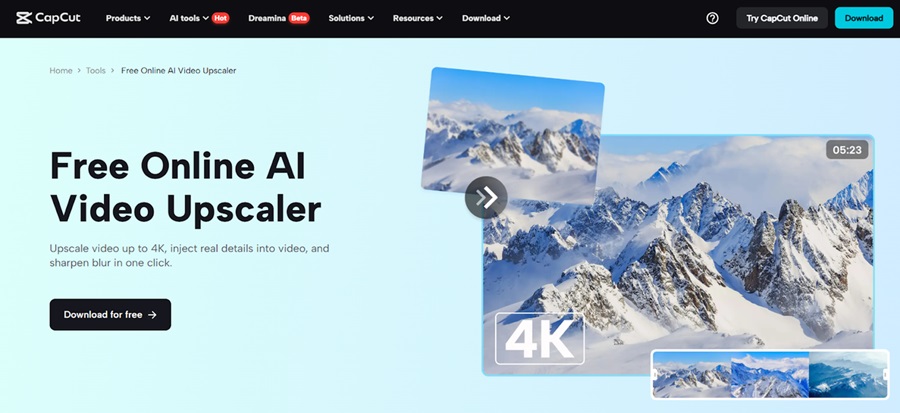
CapCut Desktop Video Editor is a video editing program that is the most powerful and is packed with advanced features, and keyframes happen to be one of the most important in it. Keyframes may be a game changer, whether you edit a project on YouTube, social media, or a client video.
Now, anybody can apply dynamic movement and creative keyframe-based effects without resorting to advanced editing software or even using a special add-on tool, since CapCut is a convenient tool with built-in intelligent tools. It is also possible to manage the flow of some text, images, videos, and even effects over time, which is excellent in the cases of an animation, zooms, or smooth changes.
Moreover, CapCut Desktop Video Editor can easily integrate with AI-based tools, such as the AI voice generator, thus it has become a comprehensive tool to use as professional content creators.
Why Keyframes Matter in Video Editing
Keyframes are important to provide animation and movement to your video elements. In CapCut Desktop Video Editor, they enable you to define certain points where (ex., position, scale, opacity, or rotation) a change occurs, and CapCut interpolates the change between them.
This is what makes CapCut’s keyframes special:
Easy to use: It is very easy to add as well as change keyframes through a couple of clicks.
Precise control: Adapt movement and effects into a refined outcome.
Multi-layer animation: Animate a stack of layers of video or text.
Adjustable fine-tuning: Scale, motion path, or opacity of any element.
And put together with the voiceovers done with the AI voice generator, your animated content will be all the more interesting and professional.
Step-by-Step: How to Use Keyframes in CapCut Desktop
Step 1: Launch CapCut and Start a New Project
Let us start by launching CapCut Desktop Video Editor and choosing the button New Project. You can import your media, video clips, images, or audio and drop them into the timeline.
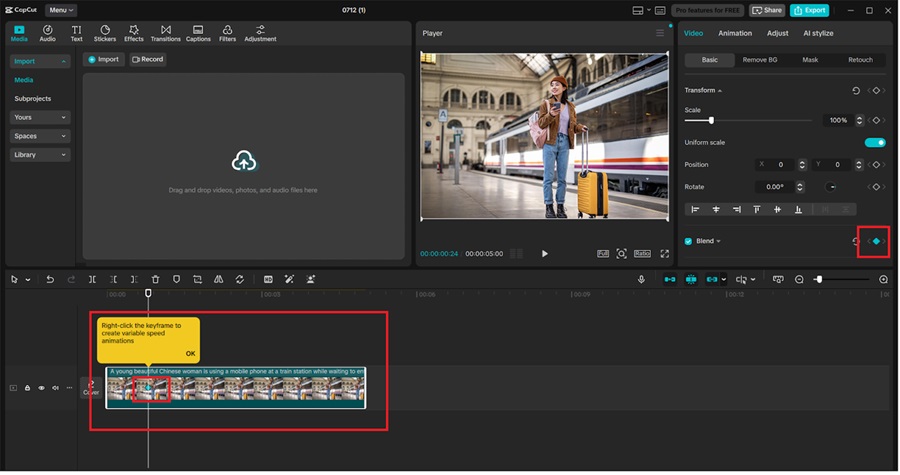
The first step in animating using key frames is to select the clip or layer that you would like to animate. This can be a video, a text, or an image.

Step 2: Open the Keyframe Tool
Having made your choice of element, move over to the preview panel and seek out the diamond-shaped keyframe icon. To create your first keyframe, you will then have to go to the timeline interval you would like the animation to start and click on this icon to select your first keyframe.
Then, slide the playhead ahead and modify the position of the element, its scale, rotation, or opacity. An additional keyframe will be added automatically by CapCut and, animate the transition between the two positions.
You are able to preview your animations and continue with changes until it seems smooth. Keyframes are great when you want to control things precisely, in the case of zoom-ins, slides, or fade effects.
The video quality can also be increased now that your visuals have animation in them. If you see blurriness in your video footage, then the AI video upscaler of the CapCut will help to make your video clearer. It is only a one-click away to enhance your clips and make them look much sharper and more professional.
Step 3: Apply Keyframes to Text or Overlays
CapCut Desktop Video Editor enables you to do the same thing with texts and overlays. Click on your text layer, slide playhead, and position or scale to get entrances or exit animations.
That can be utilized as animation lower-thirds, titles, or calls. Keyframe timeline provides you complete control over when each animation begins and ends.
Include such transitions and effects between the items to obtain a smooth and well-made video. In case you have voiceovers or other dialogue in your video, you may synchronize the movement of the text with the audio output by easily setting keys along the timeline.
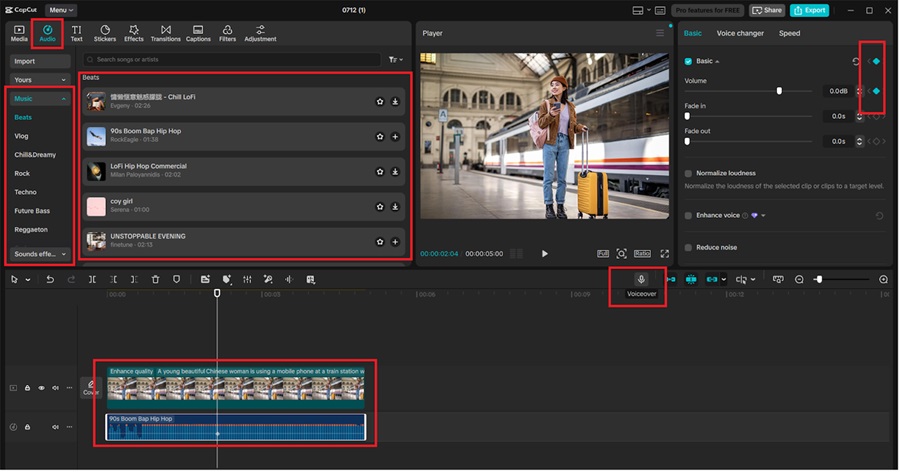
Step 4: Enhance with Music and Voiceovers
Desire to turn your keyframe animations into life? Add some sound effects or even music, which coincides with your animations. The audio tab in CapCut has a broad range of sound effects and songs.
It is possible to add narration as well with the aid of the built-in AI voice generator. All you do is simply type your script and select a voice tone, and CapCut will render a realistic voiceover that can be moved into the timeline. It is quick, appears formal, and is ideal when making a tutorial or an informative video.
When appealing to a global audience, one can use a text-to-speech AI feature that will allow translating your script into other languages and making your animated video more approachable.
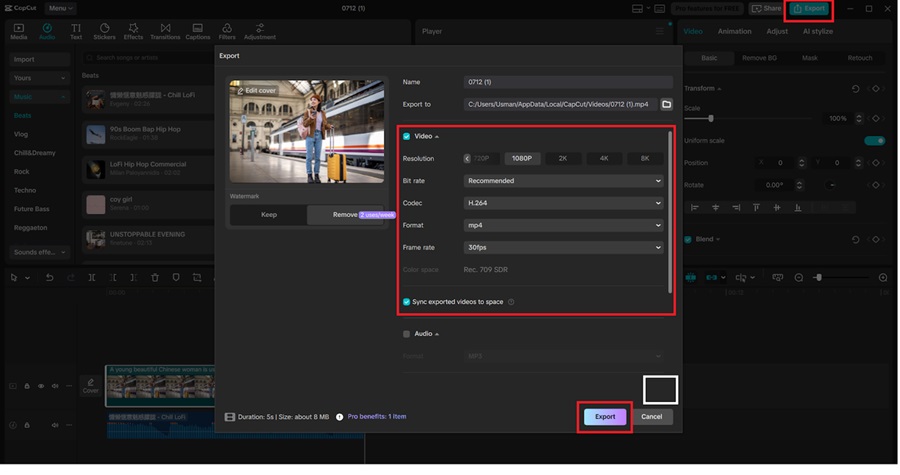
Step 5: Exporting Your Animated Video
After you are ready with your video, hit Export (upper right). Select a video format and resolution – CapCut is compatible with HD and 4K.
Check that all the keyframe transitions, voiceovers, and effects are synced just before exporting. Then save and share your refined video with a lot of confidence.
Final Thoughts
Being experienced in using keyframes in CapCut Desktop will provide you with the opportunity to realize your vision of working with your videos. The keyframes are how you can create more interesting content and graphics that are visually pleasing to the audience, whether you are working on subtle motion of the text or more complicated animations in a presentation.
Intuitive tools in CapCut, coupled with an array of AI-enhanced options, such as the AI voice generator, AI video upscaler, and text-to-speech AI tools, allow one to create professional content without the option of a steep learning curve.