You know that moment when you go to rehang a picture and find the hook mangled – like it has been through a bar fight it definitely lost? That small, slightly bent piece of metal can stop you cold, picture in hand, wall waiting. Do you toss it out, or do you quietly mutter, “maybe I can fix this?”
A bent hook does not automatically mean it is finished. The real decision hinges on understanding metal fatigue – think of it as the tired knees of an old footballer who’s been through too many matches. Once metal has been stressed past its elastic limit, it loses the bounce-back ability. Look at the hook from multiple angles under bright light. If you see fine hairline cracks or a whitish “stress bloom” (where the plating looks cloudy compared to the rest), that hook has already been structurally compromised. No amount of straightening will restore its original strength.
Hooks bent outward at a shallow angle, however, retain most of their load-bearing capacity. What you need to assess is the radius of the bend. A tight kink with a near-90-degree fold concentrates stress in one point, while a wide, sweeping bend distributes it. Wide bends (radius ≥ 5 mm) can be safely corrected, while sharp kinks (radius ≤ 2 mm) nearly always leave a hidden weak spot.
Different alloys behave differently under repair:
- Brass-plated steel: tensile strength ~250 MPa, tolerates multiple bends if corrected slowly.
- Aluminum: tensile strength ~90-120 MPa, lightweight but weak, prone to fracturing after one bend.
- Solid brass: tensile strength ~200 MPa, soft, decorative, bends easily but work-hardens rapidly – every adjustment stiffens the metal until it eventually snaps.
- Hardened steel: tensile strength ~600-800 MPa, extremely strong, but once bent, nearly impossible to realign without cracking.
Practical takeaway from inspection: salvage hooks only if bends are minor, without cracks, and metal type can handle correction.
Best Tools for Straightening Picture Hooks Safely
Confession time: using your fingers to bend a hook back is like trying to fix a watch with boxing gloves on. It feels heroic, but the result is messy.
Every successful repair starts with the right gripping and pressing surfaces.
Bare hands introduce uneven torque and risk micro-twists that weaken the shank.
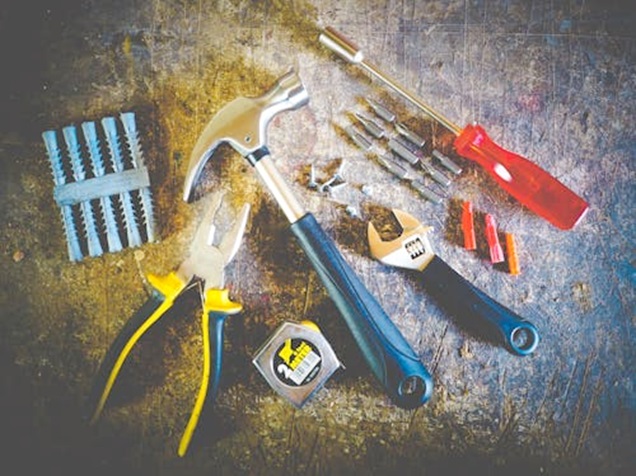
Specialized tools we recommend:
1. Parallel-Action Pliers (e.g., Maun Long Nose Pliers)
- Jaws stay parallel, applying even pressure across the surface.
- Prevents new stress points and avoids twisting or scarring delicate hooks/wire.
- The slim, tapered shape reaches into tight bends and grips fine wire hooks (≤1.5 mm diameter) with precision.
2. Bench Block or Mini Anvil (≥ 50 × 50 × 20 mm, hardened surface)
- Provides a flat, hard surface for hammering.
- Allows controlled flattening of bends without denting the tool or the hook.
3. Planishing Hammer (200–300 g, polished 20–25 mm face)
- Spreads force evenly for smooth corrections.
- Avoids sharp blows that create cracks or weak spots.
4. Needle Files (fine cut 2–4, ~200–300 TPI)
- Smooth out burrs or rough edges after straightening.
- Removes tiny imperfections without gouging the metal.
5. Soft Jaw Covers (nylon inserts or chamois leather wrap)
- Cushion plier jaws to prevent scratching or marking metal.
- Spread pressure evenly during clamping.
Imagine the hook wrapped in a thin strip of 0.5 mm chamois leather before clamping – suddenly, that little bit of suede luxury spreads the pressure evenly like a Michelin-starred chef smoothing dough.
Essential tool insight: professional tools extend hook life dramatically, and investment in one or two high-quality pliers pays off across years of reuse.
How to Straighten Hooks Without Weakening Metal
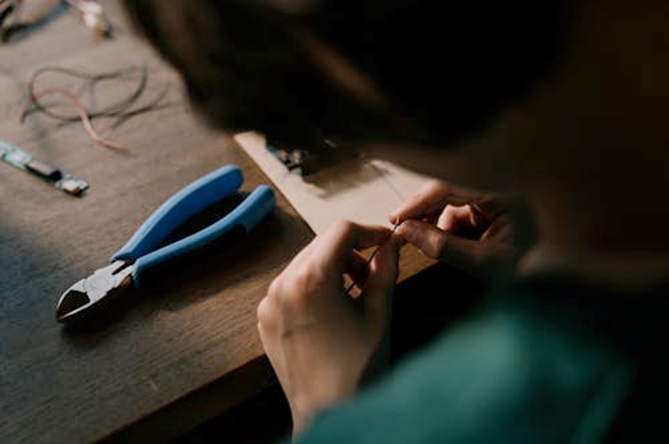
Metal behaves predictably under stress: apply gradual, even pressure and it will realign without protest; force it quickly and it will fracture. When straightening a hook, place plier jaws as close as possible to the bend to localize control – ideally within 2-3 mm of the kink. Move the bend in increments – think of it like turning the pages of a first edition from Penguin Classics: careful, deliberate, no tearing.
If you are working with thicker steel hooks, consider gentle annealing. This means slightly warming the metal to 120-150 °C (a hairdryer on high typically reaches ~140 °C; a heat gun at low setting ~130 °C) to make it more malleable before correction. Be careful not to exceed 200 °C, as brass plating begins to discolor and steel temper can be altered.
For hooks flattened against the wall, lay them flat on a bench block. Strike with a planishing hammer at ~150-200 g force per tap in overlapping passes, rather than one heavy blow. This keeps the curve consistent. For picture wire, kink removal requires rolling the wire between two hard, smooth objects. Professionals often use two screwdriver shafts of ~6-8 mm diameter – roll the wire back and forth until the kink smooths out without sharply bending any single strand.
Technique highlight: steady corrections reduce stress concentration, ensuring repaired hooks and wires keep their working strength.
How to Test Repaired Picture Hooks for Safety

Would you put a priceless first-edition from Oxford University Press on a shelf you had not tested? Probably not. The same logic applies here. Even perfectly straightened hooks may have hidden weaknesses. To avoid heartbreak (or a shattered frame), conduct controlled load testing. Secure the hook into a piece of scrap wood at least 18 mm thick. Hang a weight 10-20% heavier than the picture you intend to display. For example, if the picture weighs 5 kg, test with 6 kg. Leave it for 6-12 hours. Observe whether the hook keeps its shape or begins to yield.
For wires, create a test loop with the actual wire and pull against it with steady force. A good test object is a grocery bag loaded with books, calibrated on a scale to match or slightly exceed your frame’s weight (e.g., 7 kg test weight for a 6 kg picture). Leave the weight suspended for a full 24 hours. If the strands separate or the twist loosens by more than 2 mm, discard the wire.
For valuable artwork, apply a “safety factor” of ×2. If a reused hook holds 10 kg during testing, limit its working load to 5 kg on a real frame. This matches professional framing standards, where redundancy reduces accident risk.
Reliability cue: confirmed weight testing gives you peace of mind that your repaired hardware will perform reliably, not just appear straight.
Benefits of Reusing Hooks and Wires Instead of Replacing
Think of it this way: every hook you rescue is one less coin spent at the hardware store and one less jagged scrap rattling in a landfill. The average household replaces picture hooks more often than necessary. If you hang 15 frames per year, replacing hardware at £0.20 per hook, that adds up to £3 annually. Over 20 years, this reaches £60 – without counting wires, which average £4-6 per spool. By straightening and reusing even 50% of hooks, you cut this lifetime cost in half.
More importantly, each discarded hook adds ~10 g of metal waste. Ten hooks per year equal 100 g annually, or 2 kg over two decades. Multiply across thousands of households, and the cumulative effect is substantial. Every reclaimed hook reduces extraction demand for steel, brass, or aluminum.
And here is the quiet punchline: there is dignity in not being wasteful. Each straightened hook that secures a family portrait reinforces a mindset of care over convenience. As Marcus Aurelius wrote in Meditations, “Waste no more time arguing about what a good man should be. Be one.” Repairing a hook instead of binning it is a small, physical way of doing exactly that (source).
Conservation insight: thoughtful reuse saves money, cuts waste streams, and offers a meaningful sense of responsibility in daily life.
How to Organize Repaired Hooks and Wires for Future Use
Ever tried to find one single bent-but-fixed hook in a drawer of random screws, washers, and IKEA hex keys? That is Dante’s Inferno in miniature. Repaired hardware often becomes clutter if not stored properly. Professional framers use divided parts boxes, each compartment at least 30 × 40 mm, labeled with hook size (e.g., No. 2 holds up to 5 kg, No. 3 up to 10 kg, heavy-duty D-ring up to 20 kg). This lets you instantly find a hook with the right weight rating for your frame. Clear jars are excellent for visibility, but unless labeled, they encourage guesswork.
Coiled wire benefits from structured spools. Wind wire around flat cardboard at least 100 mm wide, tape the end, and write maximum tested weight (e.g., “Rated 7 kg”) on the card. This ensures you never second-guess whether a wire is strong enough when the frame in your hands is expensive or sentimental.
For those who reuse hardware frequently, dedicate a small “hanging kit.” A toolbox (300 × 150 × 120 mm works well) stocked with straightened hooks, smoothed wires, and the pliers you use for repairs means you always have supplies ready. Include a notecard with safety notes (e.g., “tested to 5 kg”) so you never overload hardware by mistake.
Organizational key: consistent labeling and ready access turn reuse from an occasional habit into an efficient, long-term practice.