If you’ve ever wondered how to plant ginger and harvest a bountiful supply of fresh, aromatic rhizomes from your own garden, you’re not alone. Ginger (Zingiber officinale) is one of the most rewarding crops for both home gardeners and small-scale farmers in the USA. Its warm, spicy flavor transforms countless recipes, and its medicinal benefits — from easing nausea to reducing inflammation — make it a kitchen and wellness staple.
Yet for many first-time growers, the dream fizzles into disappointment. Rhizomes rot before they sprout, leaves scorch in the sun, or harvests turn out fibrous and bland. The truth is, ginger isn’t difficult to grow — but it has specific needs rooted in its tropical origins. Understanding these requirements is the key to success.
This guide will walk you through exactly how to plant ginger, from choosing the right planting material to adjusting for your climate, avoiding common mistakes, and harvesting for peak flavor.
Understanding the Ginger Plant
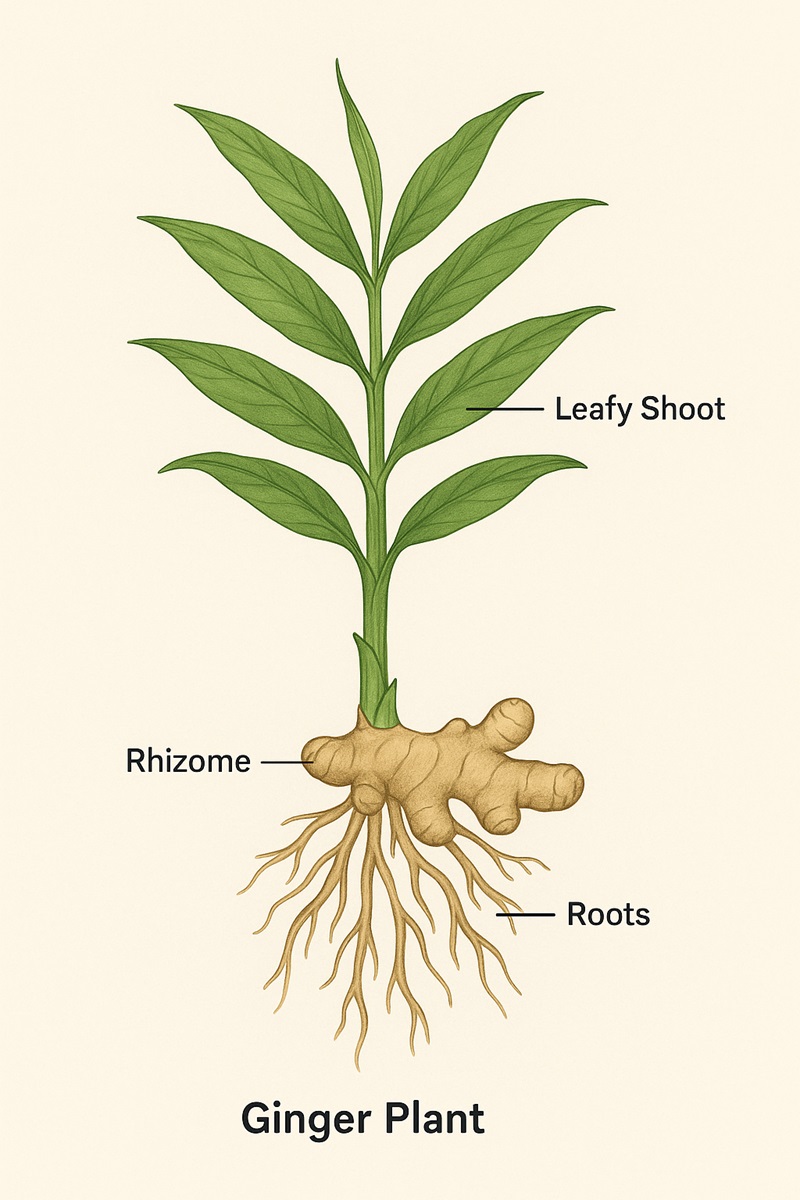
Ginger isn’t actually a root in botanical terms — it’s a rhizome, an underground stem that stores nutrients and sends up leafy shoots. That’s why when you plant a piece of ginger, you’re not growing from seed, you’re essentially cloning the plant.
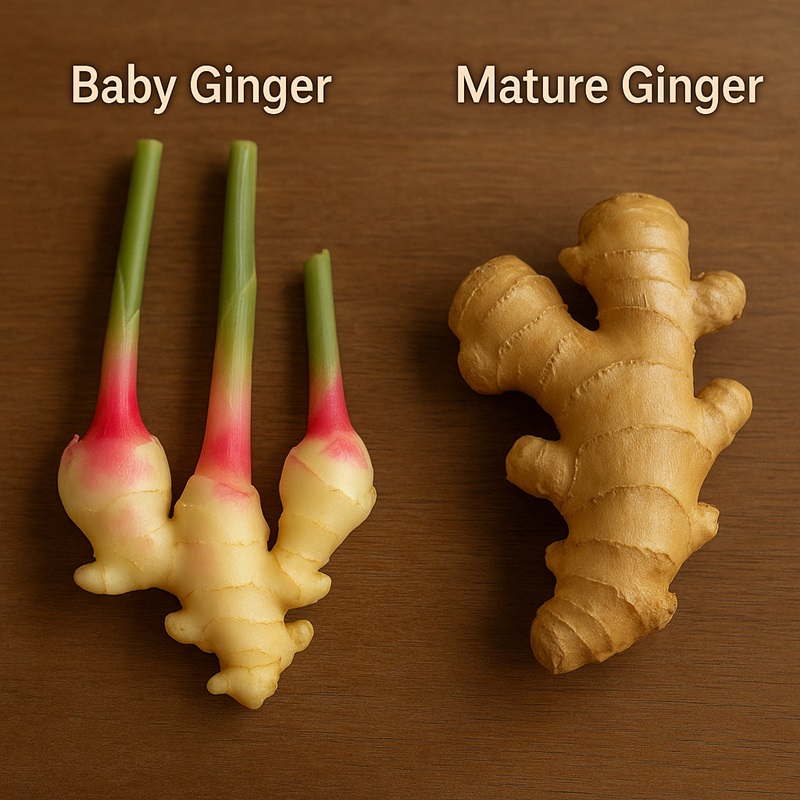
In the USA, the most common edible type is Zingiber officinale. Baby ginger is harvested young for tender, fiber-free flesh, while ornamental gingers are grown for their flowers, not for eating. Ginger thrives in USDA zones 8–12, but with the right care, it can be grown indoors or in greenhouses in cooler zones.
Seeds vs. Rhizomes: The Best Way to Plant Ginger
Many first-time growers think they can plant ginger like tomatoes or peppers — from seeds — and are surprised when it doesn’t work.
- True Ginger Seeds:
- Ginger does produce seeds in rare cases, but they are tiny, slow to germinate, and not commonly available for culinary varieties.
- Seeds require highly controlled tropical conditions and often take months to sprout.
- Plants from seed may take years to produce harvestable rhizomes.
- Rhizomes (Recommended):
- The most reliable, fastest, and easiest way to grow ginger.
- Each rhizome piece already contains stored energy and growth buds (“eyes”).
- Produces harvestable ginger in 8–10 months for mature rhizomes, 4–6 months for baby ginger.
- You can replant part of your harvest each season for continuous crops.
Verdict: For home gardeners and farmers in the USA, planting from rhizomes is by far the better option — it’s faster, easier, and produces more consistent results.
Ginger Varieties
| Variety Name | Flavor Profile | Days to Maturity | Best Use | Climate Suitability |
| Zingiber officinale (Common Edible) | Classic warm spice, slightly sweet | 240–280 days | Culinary, medicinal | Warm & humid; indoor in cold zones |
| Baby Ginger | Mild, tender, less fibrous | 120–180 days | Fresh eating, quick pickles | All climates with indoor start |
| Yellow Ginger (Hawaiian) | Earthy, slightly peppery | 220–260 days | Cooking, teas | Tropical/subtropical zones |
| Galangal (Alpinia galanga) | Sharp, pine-like, citrusy | 250–300 days | Thai, Indonesian cuisine | Warm climates; greenhouse in cool zones |
| Ornamental Ginger (Alpinia purpurata) | Not edible | — | Landscaping, cut flowers | All warm zones |
| Turmeric (Curcuma longa) | Warm, earthy, bitter | 250–300 days | Culinary, dye, medicinal | Tropical/subtropical; indoor in cool zones |
Tip: While Zingiber officinale is the most common edible type for USA growers, experimenting with galangal or turmeric can diversify your harvest and income potential if selling at farmers markets.
When to Plant Ginger in the USA
Timing can make or break your ginger crop. Ginger needs warm soil — at least 68°F (20°C) — to sprout and grow vigorously. Plant too early in cold soil, and rhizomes may rot; plant too late, and the season may be too short for mature growth.
General planting windows by region:
| Region | Best Planting Time |
| Southern USA | March–April |
| Pacific Coast | April–May |
| Midwest & Northeast | Late May–June (after last frost) |
| Year-round option | Indoors or greenhouse |
Preparing the Perfect Soil
Ginger detests waterlogged soil. To thrive, it needs loose, loamy, nutrient-rich earth with a pH between 5.5–6.5. In heavy clay soils, amend generously with compost and coarse sand or perlite for better drainage. Raised beds are an excellent option in wet climates.
Before planting:
- Remove all weeds and debris.
- Work in 2–4 inches of well-aged compost or manure.
- Shape beds so excess water drains easily.
Step-by-Step Guide: How to Plant Ginger for Maximum Yield
Planting ginger is a sequence where every step matters. Here’s the process:
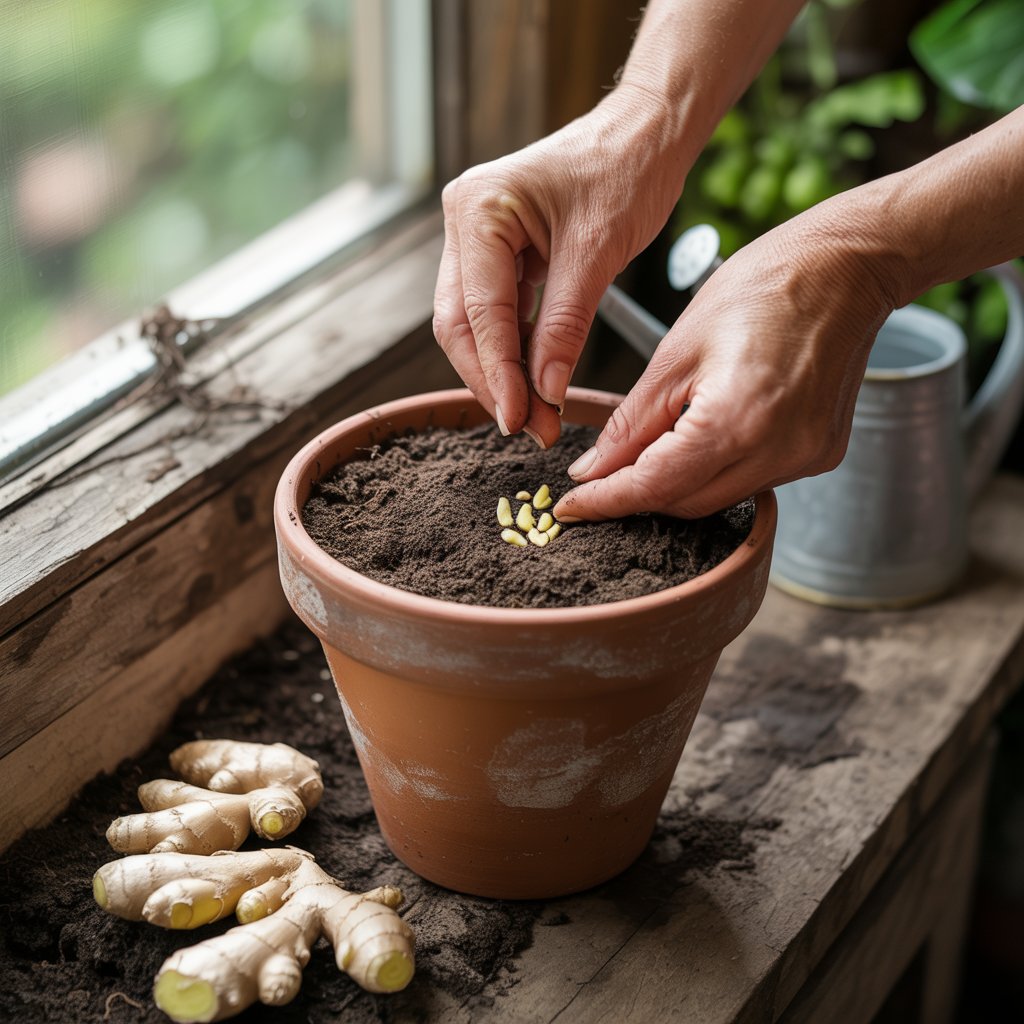
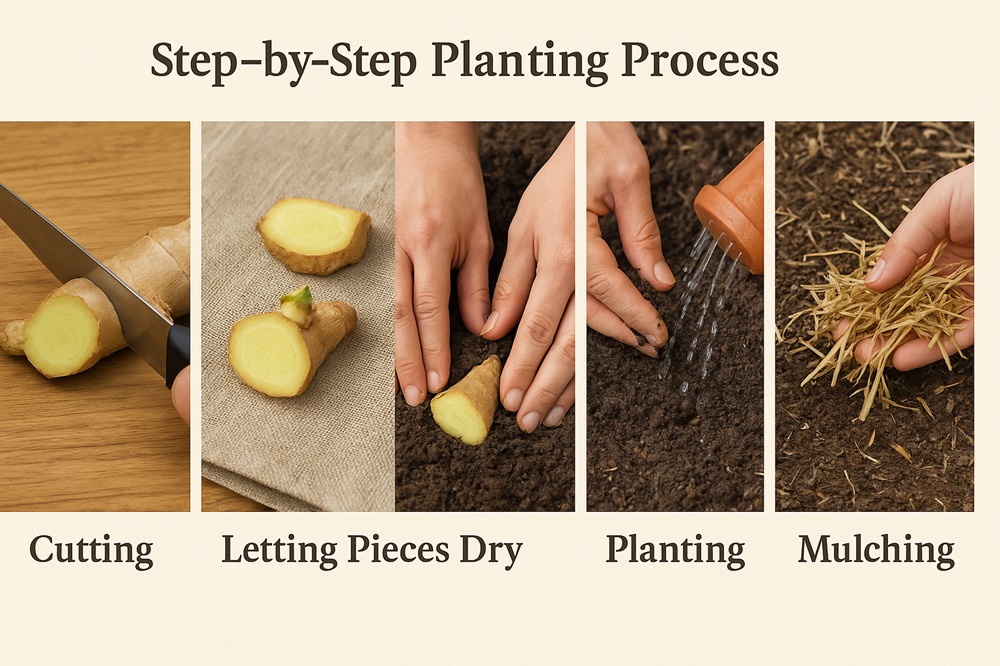
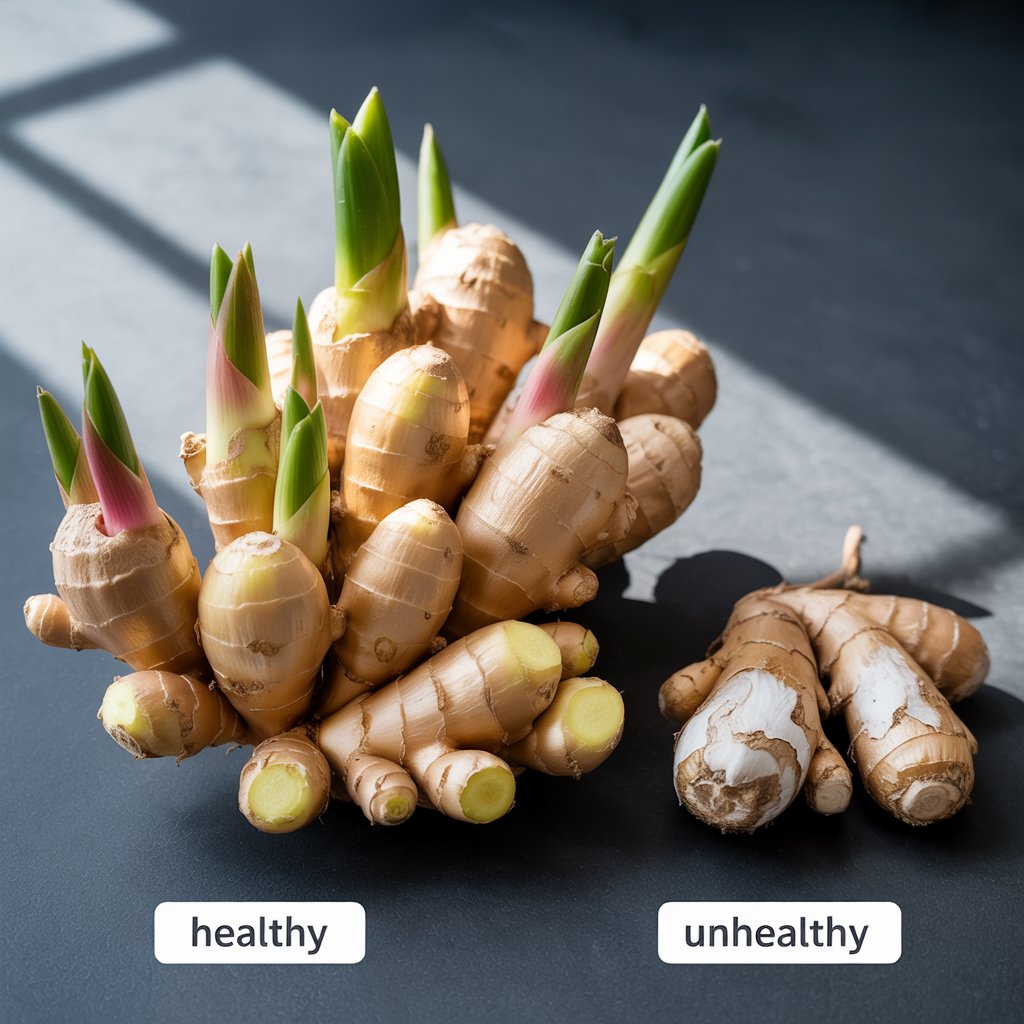
- Select and Prepare Rhizomes
Choose plump, healthy pieces with at least one visible bud. Slice larger rhizomes into 1–2 inch pieces, each with 1–3 buds. Let the cut pieces dry in a shaded, airy place for 24–48 hours so they develop a callus, which helps prevent rot. - Set the Right Depth
Plant rhizome pieces 2–4 inches deep, buds facing upward. In pots, lean toward the shallower end (2 inches) to make sprouting easier. - Space for Success
In the ground, space rhizomes 8–10 inches apart in rows 12–16 inches apart. In containers, use one piece per 12-inch pot or space 8 inches apart in larger tubs. - Water Wisely
After planting, moisten the soil without soaking it. During sprouting, keep the soil consistently damp but never soggy. Adjust frequency based on your climate — daily in hot, dry regions, every few days in cooler, humid zones. - Mulch for Moisture and Protection
Apply 2–3 inches of organic mulch, keeping it an inch away from the emerging shoots. Mulch helps maintain steady moisture, suppresses weeds, and protects against temperature swings.
Month-by-Month Ginger Growing Calendar
| Month | Task |
| Feb–Mar | Pre-sprout indoors in cool zones |
| Apr–Jun | Plant outdoors when soil warms |
| Jun–Aug | Maintain watering, mulch, and shade |
| Sep–Oct | Feed with compost tea or organic fertilizer |
| Oct–Nov | Harvest baby ginger |
| Dec–Jan | Harvest mature ginger, store for winter |
Caring for Your Ginger Plants
Ginger is both drought-sensitive and prone to rot from overwatering. The goal is even, consistent moisture — about an inch per week. Feed with an organic, balanced fertilizer (NPK 5-5-5) every 4–6 weeks.
Partial shade mimics ginger’s natural understory habitat. In scorching summers, a 30–50% shade cloth can prevent leaf burn. Indoors, place pots in a bright location with indirect light.
Common Mistakes to Avoid
- Overwatering: The #1 cause of rot — water only when the top inch of soil is dry.
- Planting Too Early: Cold soil kills buds before they sprout.
- Poor Drainage: Causes stunted growth and disease.
- Ignoring Shade Needs: Ginger prefers filtered light over full sun.
- Harvesting Too Early or Too Late: Timing affects flavor and texture.
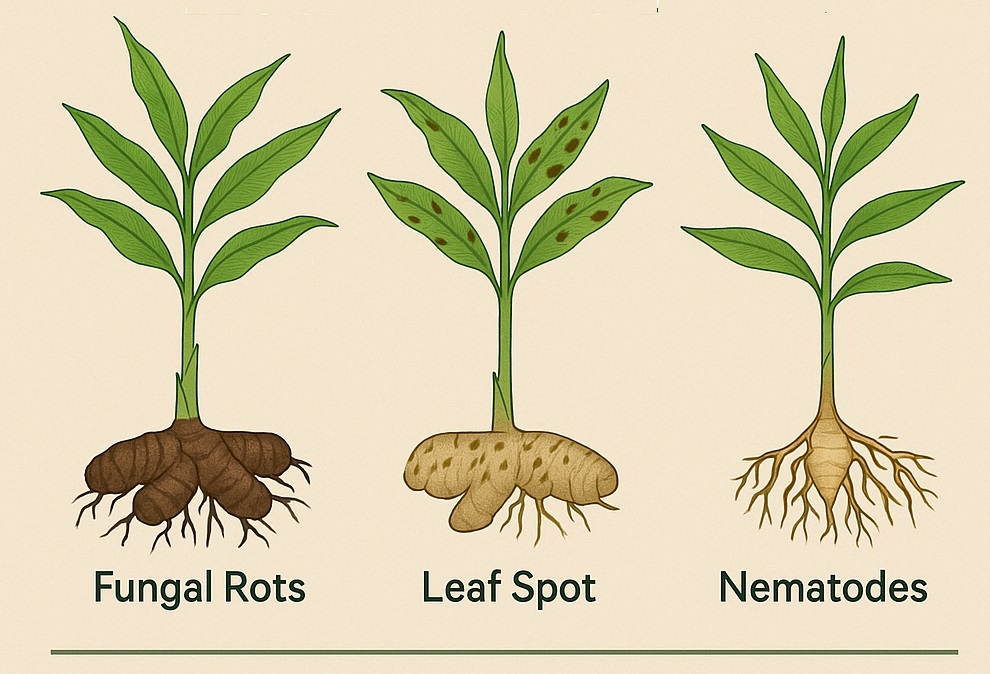
Pests, Diseases, and How to Beat Them
Ginger’s main enemies are fungal rots, leaf spot, and nematodes. Space plants well for airflow, rotate crops every 2–3 years, and consider organic treatments like neem oil or copper spray in wet conditions.
Quick ID Tips:
- Yellow leaves in mid-season may signal nitrogen deficiency.
- Slimy rhizomes usually mean poor drainage.
- Stunted growth may be due to overcrowding or soil depletion.
Climate-Specific Solutions
Hot & Dry Regions: Mulch heavily, use drip irrigation, mist leaves in early morning to boost humidity.
Cool Climates: Start indoors early, use hoop houses to extend the season, harvest as baby ginger if frost comes early.
Humid Areas: Focus on airflow, raised beds, and disease-resistant stock.
Growing Ginger in Containers & Indoors
Pain Point: Limited space and cold weather stop many from trying.
- Container Size: At least 12–14 inches deep.
- Soil Mix: 60% compost, 30% potting soil, 10% sand.
- Light: South-facing window or grow lights for 6–8 hours daily.
- Mobility: Move pots indoors before frost.
Harvesting and Storing Ginger
For baby ginger, harvest after 4–6 months — the skin will be thin and easy to peel. Mature ginger takes 8–10 months and is ready when leaves yellow and stalks die back.
Storage options:
- Refrigerate wrapped in paper towels (up to 3–4 weeks).
- Freeze whole or sliced (up to 6 months).
- Dry slices for long-term storage.
Why Growing Your Own Ginger Matters
Homegrown ginger isn’t just fresher and tastier — it’s more sustainable. Most store-bought ginger in the USA is imported, often traveling thousands of miles. By growing your own, you reduce your carbon footprint and ensure your crop is chemical-free.
Key Takeaways
- Always start with healthy, organic rhizomes.
- Plant when soil is consistently warm.
- Provide rich, well-drained soil and partial shade.
- Avoid overwatering — ginger hates wet feet.
- Adjust care to your local climate for best results.
FAQs About How to Plant Ginger
Q1: Can I plant ginger from the grocery store?
Yes, but success rates are lower due to possible growth inhibitors.
Q2: How much ginger can one plant produce?
Under good conditions, 1–2 pounds per plant.
Q3: Does ginger grow better in pots or in the ground?
Both work well — containers allow mobility, while ground planting can yield larger harvests.